Essential grooming tools
When I groom dogs, I rely on a few key tools. Brushes and combs come first. I chose them based on the dog’s coat type. Slicker brushes work well for long or curly hair. Pin brushes suit medium coats. Bristle brushes are great for short-haired breeds.
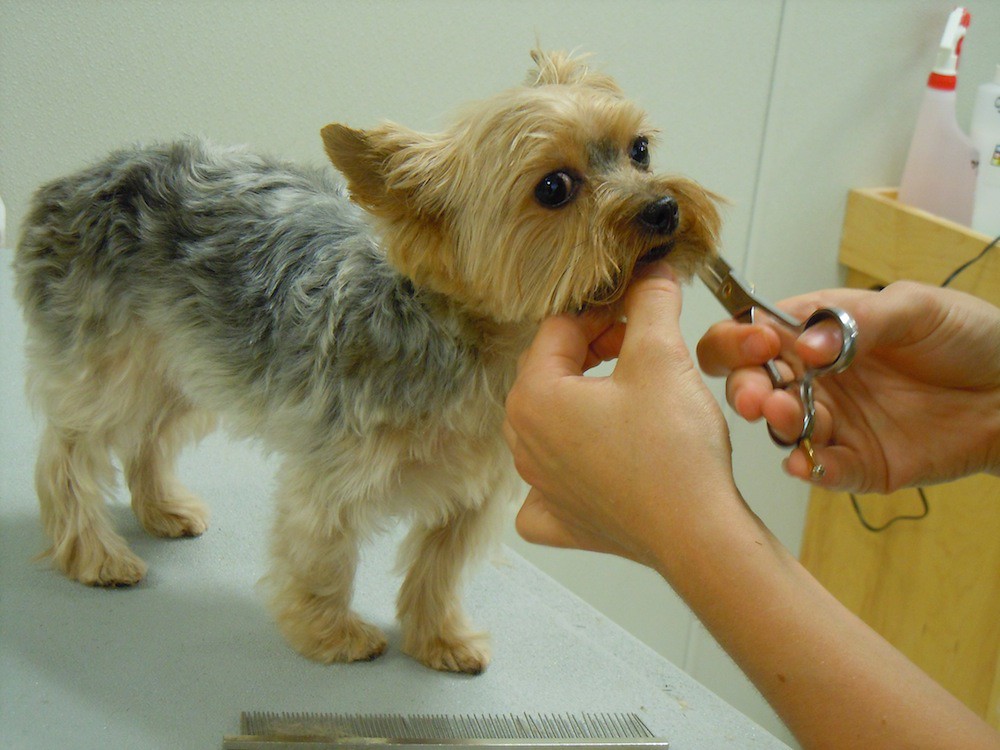
Clippers and scissors are crucial for trimming. I always keep my clippers clean and oiled. Sharp scissors are a must for precision work around sensitive areas.
Nail trimmers come in two main types:
- Guillotine style
- Scissor style
I prefer guillotine trimmers for most dogs. They offer more control and precision.
For bathing, I gather these supplies:
- Dog-specific shampoo
- Towels
- Non-slip mat
- Spray nozzle attachment
A good quality dryer rounds out my toolkit. It speeds up the drying process and helps prevent matting in long-coated breeds.
Best dog grooming tools
| Image | Price | Buy | Title |
|---|---|---|---|
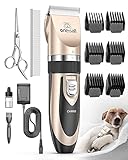 Top Top | Buy Now | oneisall Dog Shaver Clippers Low Noise Rechargeable Cordless Electric Quiet Hair Clippers Set for Dogs Cats Pets | |
 | Buy Now | Chom Chom Roller Pet Hair Remover and Reusable Lint Roller - ChomChom Cat and Dog Hair Remover for Furniture, Couch, Carpet, Clothing and Bedding - Portable, Multi-Surface Fur Removal Tool | |
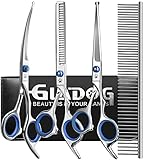 | Buy Now | GLADOG Professional 5 in 1 Dog Grooming Scissors Set with Safety Round Tips, Sharp and Heavy-duty Pet Grooming Shears for Cats | |
 | Buy Now | AIRROBO Dog Grooming Vacuum, Dog Grooming Kit,12000Pa Strong Pet Grooming Vacuum for Dogs, 2L Large Capacity Dog Vacuum for Shedding Grooming Hair, Dog Hair Vacuum, 5 Pet Grooming Tools, Quiet,PG100 | |
 | Buy Now | Dog Nail Grinder, Dog Nail Trimmers and Clippers Kit, Super Quiet Electric Pet Nail Grinder, Rechargeable, for Small Large Dogs & Cats Toenail & Claw Grooming,3 Speeds, 2 Grinding Wheels (A-Dark Blue) | |
 | Buy Now | Maxpower Planet Pet Grooming Brush - Double Sided Shedding, Dematting Undercoat Rake for Dogs, Cats - Extra Wide Dog Grooming Brush, Dog Brush for Shedding, Cat Brush, Reduce Shedding by 95%, Blue | |
 | Buy Now | Best Pet Supplies 8" x 9" Pet Grooming Wipes for Dogs & Cats, 100 Pack, Plant-Based Deodorizer for Coats & Dry, Itchy, or Sensitive Skin, Clean Ears, Paws, & Butt - Calming Lavender | |
 | Buy Now | Burt's Bees for Pets Natural Itch Soothing Spray with Honeysuckle | Best Anti-Itch Spray for Dogs With Itchy Skin | Cruelty Free, Sulfate & Paraben Free - Made in the USA, 10 Oz | |
 | Buy Now | Pet Grooming Gloves - Gentle Dog Bathing Shampoo Brush - Massage Mitt with Enhanced Five Finger Design - Efficient Deshedding Glove for Dogs, Cats, Rabbits and Horses - 1 Pack |
Preparing your dog
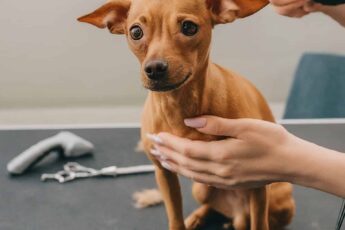
Creating a positive environment is key to successful grooming. I start by choosing a calm, quiet space. This helps reduce stress for both me and the dog.
I always let the dog sniff and investigate my tools before using them. This builds trust and familiarity. Treats and praise go a long way in making grooming enjoyable.
Establishing a routine is crucial. I aim to groom at the same time and in the same place regularly. This helps dogs know what to expect and reduces anxiety.
When introducing new tools, I take it slow. I let the dog see and hear clippers before turning them on. With nail trimmers, I might touch the dog’s paws without cutting at first. This gradual approach helps prevent fear or resistance.
“Patience is the key to successful dog grooming. Rush, and you’ll likely encounter resistance.” – Professional Groomer
I always end grooming sessions on a positive note, even if we don’t finish everything. This leaves the dog with a good association for next time.
Remember, every dog is different. Some may need more time to adjust than others. I always respect their individual needs and comfort levels.
Brushing techniques
Choosing the right brush is crucial for effective grooming. I consider the dog’s coat type when selecting a brush. Here’s a quick guide:
| Coat Type | Recommended Brush |
|---|---|
| Short | Bristle brush |
| Medium | Pin brush |
| Long | Slicker brush |
| Curly | Slicker or pin |
For proper brushing motions, I always brush in the direction of hair growth. This prevents discomfort and reduces the risk of skin irritation. I start at the head and work my way down the body, paying extra attention to areas prone to matting.
Frequency varies based on coat type:
- Short-haired: 1-2 times per week
- Medium-haired: 2-3 times per week
- Long-haired: Daily
I find that regular brushing distributes natural oils, removes dead hair, and keeps the coat healthy. It also gives me a chance to check for any skin issues or parasites.
Consistent brushing is the foundation of good grooming. It’s easier to maintain a healthy coat than to fix a neglected one.
I use a de-shedding tool during shedding seasons for dogs with thick undercoats. This tool helps remove loose undercoats and reduce overall shedding.
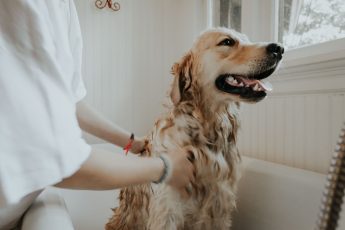
Bathing your dog
Selecting the appropriate shampoo is key to a successful bath. I always use dog-specific shampoos, as human products can disrupt a dog’s skin’s pH balance. For dogs with skin sensitivities, I opt for hypoallergenic or oatmeal-based shampoos.
Water temperature and pressure play a big role in the bathing experience. I aim for lukewarm water – too hot can be uncomfortable, while too cold can make the dog resist. I keep the water pressure moderate. High pressure can startle or irritate the dog.
I follow these steps for a thorough bath:
- Wet the coat completely
- Apply shampoo, starting at the neck and working down
- Massage the shampoo into the coat, reaching the skin
- Pay extra attention to often-neglected areas like armpits and between toes
- Rinse thoroughly
Thorough rinsing is crucial. I make sure to rinse until the water runs clear, with no soap residue. Leftover shampoo can irritate the skin and dull the coat.
For dogs with thick or double coats, I might need to shampoo twice to ensure cleanliness. The first wash removes surface dirt, while the second cleans more deeply.
After bathing, I always praise the dog and offer a treat. This helps create a positive association with bath time.
Remember, the frequency of bathing depends on the individual dog. Some might need monthly baths, while others can go longer between washes. Overbathing can strip natural oils, so I’m careful not to bathe too often unless necessary.
Drying methods
Proper drying is essential after bathing. I start with towel drying, using absorbent towels to remove excess water. Gently squeezing and patting work better than rubbing, which can tangle the coat.
For blow drying, I follow these steps:
- Set the dryer to low heat and speed
- Keep the nozzle moving to avoid overheating one spot
- Dry in the direction of hair growth
- Use a brush while drying to detangle and style
Safety is crucial when using blow dryers. I never point the dryer at the dog’s face or ears. The noise can be scary for some dogs, so I introduce it gradually.
Air drying is an option for some dogs, especially in warm weather. However, I’m careful with this method for dogs with thick coats. Leaving the coat damp can lead to skin issues or matting. If I choose air drying, I make sure to brush the coat periodically as it dries.
Here’s a quick comparison of drying methods:
| Method | Pros | Cons |
|---|---|---|
| Towel | Quiet, gentle | Time-consuming, less thorough |
| Blow dryer | Fast, thorough | It can be noisy and requires practice |
| Air drying | Natural, stress-free | Slow, risk of matting |
The drying process is as important as the bath itself. It sets the stage for a healthy, well-groomed coat.
For long-haired breeds, I often combine methods. I start with towel drying, then use a blow dryer to finish. This helps prevent matting and gives the coat a smooth, polished look.
Nail trimming
Nail trimming is often challenging, but it’s a crucial part of grooming. The key is to identify the quick – the pink part of the nail containing blood vessels and nerves. In light-colored nails, the quick is visible. For dark nails, I’m extra cautious and trim small amounts at a time.
I follow these steps for proper nail clipper use:
- Hold the paw firmly but gently
- Identify the quick (if visible)
- Cut at a 45-degree angle, parallel to the ground
- Trim small amounts at a time
- Smooth rough edges with a nail file
For dogs that are nervous about nail trimming, I break the process into short sessions over several days. Patience and positive reinforcement go a long way.
If I accidentally cut the quick, I don’t panic. I’m prepared to address bleeding accidents:
- Apply styptic powder or cornstarch to stop bleeding
- Apply pressure with a clean cloth
- Comfort the dog and end the session on a positive note
Here’s a guide for nail trimming frequency:
| Activity Level | Trimming Frequency |
|---|---|
| Low (indoor dogs) | Every 2-3 weeks |
| Moderate | Every 3-4 weeks |
| High (outdoor dogs) | Every 4-6 weeks |
Regular walks on hard surfaces can help wear down nails naturally, reducing the frequency of trims needed. However, I still check the nails regularly to ensure they’re not overgrowing.
Remember, consistency is key. Regular, short sessions can help dogs become more comfortable with nail trimming over time.
Ear cleaning
Proper ear care is crucial for a dog’s health. I always start by recognizing healthy ears. They should be pink, odorless, and free from discharge. If I notice redness, swelling, or a foul smell, I recommend a vet check-up.
For gentle cleaning techniques, I follow these steps:
- Moisten a cotton ball with a dog-specific ear cleaner
- Wipe the visible part of the ear canal and the ear flap
- Allow the dog to shake its head
- Wipe away any debris that comes out
I never insert anything into the ear canal. This can cause injury or push debris further in.
For dogs prone to ear issues, I create a regular cleaning schedule:
| Ear Type | Cleaning Frequency |
|---|---|
| Floppy ears | Weekly |
| Erect ears | Every 2-3 weeks |
| Swimmers | After each swim |
When addressing ear infections, I look out for these signs:
- Excessive scratching or head shaking
- Redness or swelling
- Bad odor
- Dark discharge
If I notice these symptoms, I advise seeking veterinary care. Home remedies can sometimes worsen infections.
Regular ear checks can prevent minor issues from becoming major problems. It’s an essential part of grooming.
Dental care
Good dental hygiene is vital for a dog’s overall health. I focus on three main areas: brushing, dental treats, and professional cleaning.
For tooth brushing methods, I use this approach:
- Choose a dog-specific toothpaste (never use human toothpaste)
- Let the dog taste the toothpaste
- Gently lift the lip to expose the teeth
- Brush in circular motions, focusing on the gum line
- Aim for 30 seconds per side
I start with short sessions and gradually increase their duration. Consistency is key—daily brushing is ideal, but 2-3 times a week can still make a big difference.
Dental chews and toys can supplement brushing. I look for products with the Veterinary Oral Health Council (VOHC) seal. These items can help reduce plaque and freshen breath. However, I always supervise chew time to prevent choking hazards.
Recognizing the necessity of professional cleaning is important. Even with regular home care, most dogs benefit from annual dental check-ups and cleanings by a vet. I watch for these signs that professional cleaning might be needed:
- Bad breath
- Yellow or brown teeth
- Red, swollen gums
- Difficulty eating
Here’s a basic dental care routine I recommend:
| Task | Frequency |
|---|---|
| Brushing | Daily (ideal) or 2-3 times/week |
| Dental chews | 2-3 times/week |
| Vet check-up | Annually |
Remember, good dental care can prevent pain, tooth loss, and other health issues. It’s an investment in the dog’s long-term wellbeing.
Eye care
Proper eye care keeps dogs comfortable and helps prevent infections. I start with removing tear stains. These reddish-brown marks often appear under the eyes, especially in light-colored dogs. To clean them:
- Dampen a soft cloth with warm water
- Gently wipe from the inner corner outward
- Use a separate cloth for each eye to avoid spreading bacteria
For stubborn stains, I mix equal parts water and canine eye wash solution. This mixture is gentle and effective.
Trimming around the eyes improves visibility and reduces irritation. I follow these steps:
- Use rounded-tip scissors
- Hold the hair away from the eye
- Trim small amounts at a time
- Work slowly and carefully
When identifying eye issues, I watch for these signs:
- Redness or swelling
- Excessive tearing
- Cloudiness
- Squinting or pawing at the eye
Any of these symptoms warrant a vet visit. Eye problems can escalate quickly, so prompt attention is crucial.
Regular eye checks are simple but vital. They can catch issues before they become serious.
Here’s a quick guide for eye care frequency:
| Task | Frequency |
|---|---|
| Check eyes | Daily |
| Clean tear stains | 2-3 times/week |
| Trim eye area | Every 4-6 weeks |
Remember, some breeds are more prone to eye issues. Flat-faced dogs often need extra attention to keep their eyes clean and healthy.
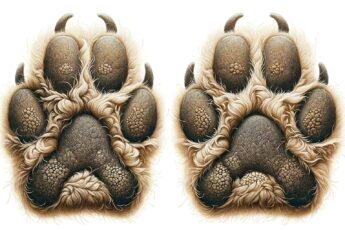
Paw maintenance
Healthy paws are essential for a dog’s comfort and mobility. I focus on three main areas: hair trimming, moisturizing, and injury checks.
Trimming paw pad hair prevents matting and reduces slipping on smooth surfaces. Here’s my process:
- Spread the toes gently
- Use small scissors to trim hair level with the paw pads
- Be careful not to cut the pads themselves
- Trim hair between toes to prevent matting
For moisturizing paw pads, I use dog-specific balms or natural alternatives like coconut oil. I apply a thin layer and massage it in, especially after walks on hot pavement or in cold weather. This prevents cracking and dryness.
When checking for injuries, I look for:
- Cuts or abrasions
- Swelling or redness
- Foreign objects like thorns or pebbles
- Cracked or split pads
I gently clean any minor wounds with warm water and pat dry. For anything more serious, I recommend veterinary care.
Here’s a paw care routine I often suggest:
| Task | Frequency |
|---|---|
| Visual check | Daily |
| Trim hair | Every 2-3 weeks |
| Moisturize | 1-2 times/week |
| Nail trim | Every 2-4 weeks |
Paw care might seem minor, but it significantly impacts a dog’s quality of life. Don’t overlook it in your grooming routine.
For dogs who spend a lot of time outdoors, I recommend more frequent checks. Different surfaces can affect paw health, so I adjust the care routine as needed.
Remember, paws are tough but sensitive. Gentle handling and regular care keep them in top condition, ensuring your dog stays active and comfortable.
Anal gland care
Anal gland issues can cause discomfort for dogs. Recognizing full glands is the first step in proper care. I look for these signs:
- Scooting on the floor
- Excessive licking of the anal area
- Strong, fishy odor
- Visible swelling near the anus
For external expression techniques, I follow these steps:
- Wear disposable gloves
- Place a damp paper towel or cloth near the anus
- Locate the glands at 4 and 8 o’clock positions
- Gently squeeze inward and upward
- Clean the area thoroughly
I always start with gentle pressure. If the glands don’t express easily, I stop to avoid causing pain or injury.
Some dogs need more frequent expressions:
| Breed Size | Typical Expression Frequency |
|---|---|
| Small | Every 3-4 weeks |
| Medium | Every 6-8 weeks |
| Large | As needed (often less frequent) |
When to seek veterinary help:
- If glands are very hard or swollen
- If there’s blood in the expressed fluid
- If the dog shows signs of pain
- If you’re unsure about the procedure
Anal gland care isn’t glamorous, but it’s crucial for your dog’s comfort. Don’t hesitate to ask a professional for help.
Regular check-ups can prevent major issues. I include anal gland checks in my grooming routine, especially for breeds prone to problems.
Coat trimming basics
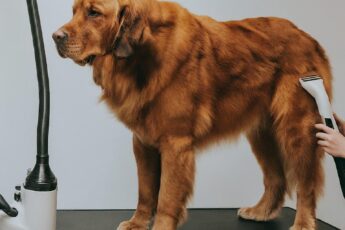
Proper coat trimming keeps dogs comfortable and looking their best. I start with using clippers safely:
- Choose the right blade length for the desired cut
- Keep clippers cool (use coolant spray if needed)
- Move in the direction of hair growth
- Hold skin taut to prevent nicks
- Take frequent breaks to avoid overheating
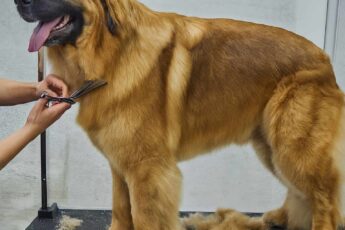
For scissoring techniques, I follow these guidelines:
- Use sharp, straight shears for bodywork
- Use curved shears for rounded areas like legs
- Hold scissors parallel to the skin, never perpendicular
- Comb hair up and trim small amounts at a time
Here’s a basic guide for different coat types:
| Coat Type | Trimming Frequency | Tools |
|---|---|---|
| Short | Every 8-12 weeks | Clippers, thinning shears |
| Medium | Every 6-8 weeks | Clippers, straight shears |
| Long | Every 4-6 weeks | Clippers, straight and curved shears |
For breed-specific cuts, I research standard styles. However, I always prioritize the dog’s comfort over strict adherence to breed standards.
Some key areas I focus on:
- Face: Trim around eyes for visibility
- Ears: Clean inside and trim excess hair
- Paws: Trim between pads for traction
- Sanitary areas: Keep short for hygiene
Remember, practice makes perfect. I start with small areas and work up to full trims. Regular maintenance between full grooms keeps the coat manageable.
Dealing with mats and tangles
Mats and tangles can cause discomfort and skin issues for dogs. I focus on prevention first. Preventing mat formation involves:
- Regular brushing (daily for long-haired breeds)
- Using the right tools for the coat type
- Addressing problem areas like behind ears and under legs
For existing mats, I use these detangling techniques:
- Start at the outer edge of the mat
- Use a detangling spray to lubricate the hair
- Work in small sections with a slicker brush or comb
- Hold the base of the mat to prevent pulling the skin
Sometimes, mats are too severe to brush out. When to cut out mats:
- If the mat is close to the skin
- If detangling causes the dog pain
- If the mat has been there for a long time
Here’s a quick guide for dealing with different levels of matting:
| Mat Severity | Action |
|---|---|
| Light | Brush out with detangling spray |
| Moderate | Section and carefully detangle |
| Severe | Cut out, seek professional help if needed |
Prevention is key with mats. Regular grooming saves time and discomfort in the long run.
Remember, cutting mats requires caution. If unsure, I always recommend seeking professional help to avoid injuring the dog.
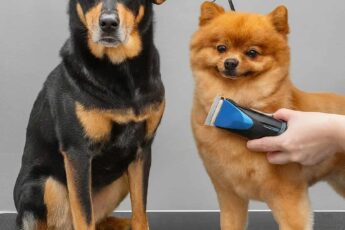
Breed-specific grooming needs
Different breeds have unique grooming requirements. I tailor my approach based on coat type and breed characteristics.
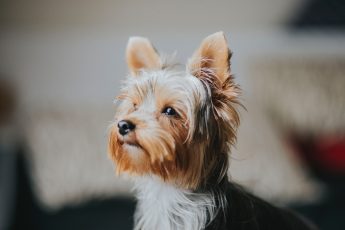
For long-haired breeds like Shih Tzus or Maltese:
- Daily brushing to prevent mats
- Regular trims every 4-6 weeks
- Special attention to facial hair and ears
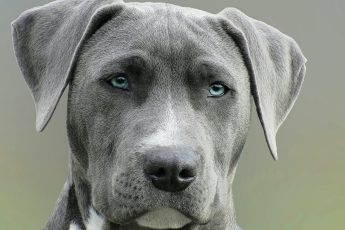
Short-haired breeds like Beagles or Labradors need:
- Weekly brushing to remove loose hair
- Occasional baths (every 2-3 months)
- Regular nail trims
Curly-coated breeds such as Poodles require:
- Brushing 2-3 times a week
- Professional grooming every 6-8 weeks
- Special attention is to prevent matting in the armpits and behind the ears
Here’s a comparison of grooming needs:
| Breed Type | Brushing Frequency | Bathing Frequency | Trimming Needs |
|---|---|---|---|
| Long-haired | Daily | Every 3-4 weeks | High |
| Short-haired | Weekly | Every 2-3 months | Low |
| Curly-coated | 2-3 times/week | Every 4-6 weeks | High |
I always research specific breed standards and health considerations. For example:
- Shar-Peis need special attention to skin folds
- Huskies shouldn’t be shaved due to their double-coat
- Schnauzers require regular hand-stripping for coat health
Understanding breed-specific needs is crucial. It affects not just appearance, but also the dog’s comfort and health.
I adapt my techniques to each dog’s individual needs, considering factors like age, health conditions, and lifestyle. Regular grooming routines tailored to the breed help maintain coat health and overall well-being.
Dog Grooming: How to Do It Yourself with Scheduling
Creating a consistent grooming schedule keeps your dog healthy and makes the process easier over time. I break down grooming tasks into daily, weekly, and monthly categories.
Daily tasks:
- Quick brush-through
- Check eyes and ears
- Wipe paws after walks
Weekly tasks:
- Thorough brushing
- Teeth brushing
- Nail check
Monthly tasks:
- Bath
- Full coat trim (if needed)
- Ear cleaning
Here’s a sample schedule for a medium-coated dog:
| Frequency | Tasks |
|---|---|
| Daily | 5-minute brush, eye check |
| Weekly | 15-minute thorough brush, teeth cleaning |
| Monthly | Bath, nail trim, ear cleaning |
I also consider seasonal adjustments. For example:
- Spring: Increase brushing for the shedding season
- Summer: Check for fleas and ticks more often
- Fall: Prepare coat for colder weather
- Winter: Moisturize paw pads frequently
Age-related adjustments are also important. Puppies need gentle, frequent grooming to get used to the process, and senior dogs might require softer tools and more frequent nail trims.
A consistent grooming schedule prevents small issues from becoming big problems. It’s an investment in your dog’s health.
I always recommend staying flexible. Some weeks might require more attention, especially after outdoor adventures or during heavy shedding periods.
Remember, the goal is to make grooming a positive, stress-free experience for both you and your dog. Start small and gradually increase grooming time as your dog becomes more comfortable with the routine.
Expert Sites on DIY Dog Grooming:
Here are some links to expert sites that offer guidance on how to groom your dog yourself:
- Homes Alive – Blog: This blog post provides a comprehensive DIY Dog Grooming Guide for Beginners. It covers everything from the benefits of DIY grooming to specific tips on brushing, bathing, de-shedding, and nail trimming: https://blog.homesalive.ca/
- American Kennel Club (AKC): The AKC offers an informative guide on How to Groom a Dog at Home. This resource provides information on grooming frequency depending on breed, basic grooming techniques, and expert health advice: https://www.akc.org/expert-advice/health/grooming/
- BarkSpot – Guides you through the art of dog grooming at home, discussing the importance of selecting the right tools and creating a cozy grooming environment.
- The Happy Puppers – Combines DIY tips with professional advice to make the grooming process smooth for you and your dog.
- Masterclip – Presents a DIY guide to keep your dog’s coat shiny and your wallet full.