Essential Tools for Dog Grooming with Scissors
Grooming a dog with scissors isn’t a walk in the park. The right tools make all the difference. Here’s your essential toolkit:
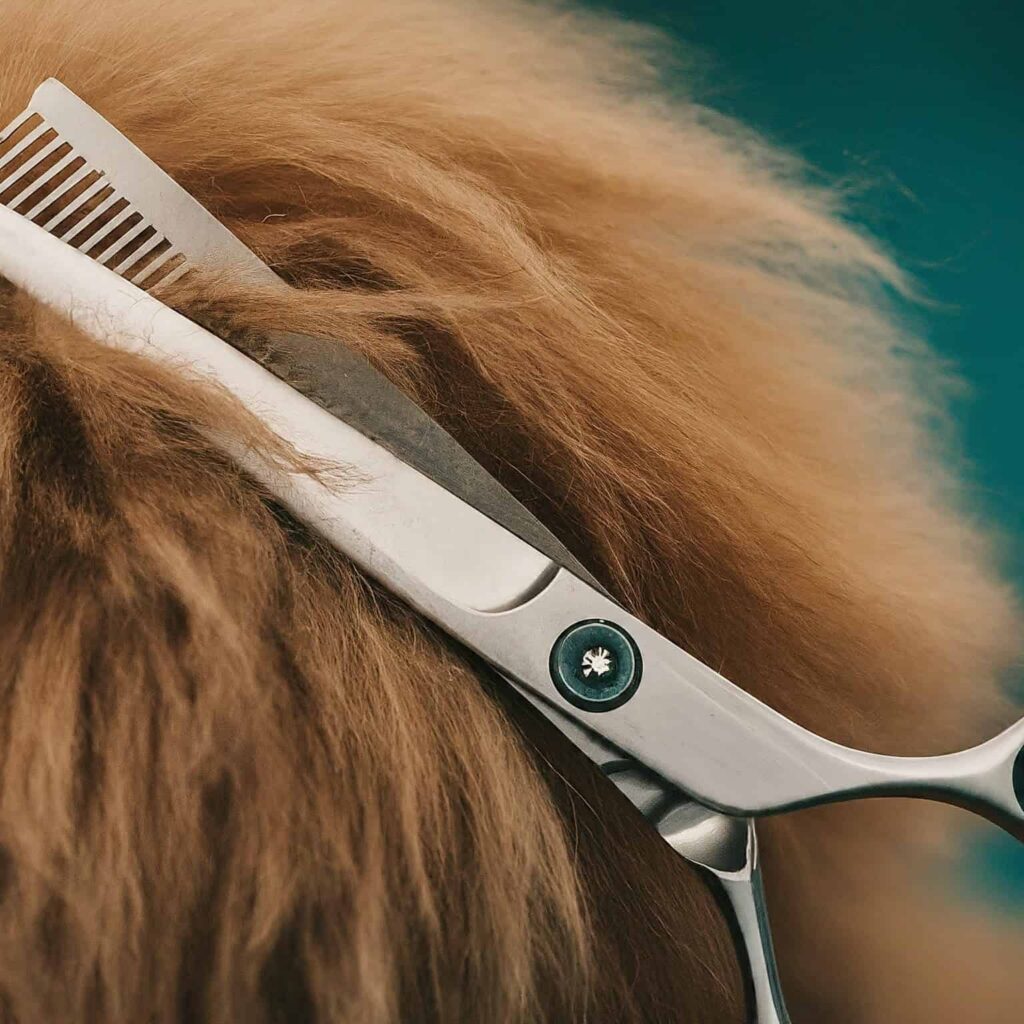
Scissors: You’ll need three types—straight, curved, and thinning. Straight scissors handle most cutting, perfect for trimming long hair and thick fur. Curved scissors shape areas like paws and faces, following your dog’s natural curves. Thinning scissors blend and even out the coat for a natural look, avoiding harsh lines.
Combs and Brushes: A sturdy metal comb untangles knots, while a slicker brush removes loose fur and dirt. These tools prep the coat for cutting, making your job easier.
Safety First: Choose scissors with rounded tips to prevent accidents. Comfortable handles and non-slip grips are crucial, especially for long grooming sessions.
Maintenance: Keep your scissors sharp and clean. Dull scissors make grooming tough and can hurt your dog. Clean tools prevent infections. A well-maintained grooming kit ensures you’re always ready.
Armed with these tools, you’re set to give your dog a top-notch grooming session. Time to snip, shape, and shine!
Best Dog Grooming Scissors
| Image | Price | Buy | Title |
|---|---|---|---|
 | Buy Now | GLADOG Professional 5 in 1 Dog Grooming Scissors Set with Safety Round Tips, Sharp and Heavy-duty Pet Grooming Shears for Cats | |
 | Buy Now | Gimars Titanium Coated Professional 6 in 1 4CR Stainless Steel Dog Grooming Scissors with Safety Round Tip, Heavy Duty Pet Grooming Scissor for Dogs, Cats and Other Animals | |
 | Buy Now | FAIGEO Dog Grooming Scissors with Safety Round Tips Stainless Steel Professional Dog Grooming Kit - Thinning, Curved Scissors and Comb for Dog Cat Pet | |
 | Buy Now | TINMARDA 5 in1 Dog Grooming Scissors Kit, Professional Dog Scissors for Grooming with Safety Round Tips, Titanium Coated Grooming Scissors Kit for Dogs Cat Pet At Home | |
 | Buy Now | 7.0in Titanium Black Professional Pet Grooming Scissors Set,Straight & Thinning & Curved Scissors 4pcs Set for Dog Grooming,(Black) |
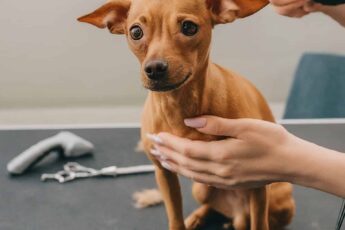
Preparing Your Dog
Before you start grooming, you need to prepare your dog. A calm environment helps a lot. Choose a quiet place with few distractions. Make sure your dog feels comfortable and safe.
Start by brushing your dog’s coat. This removes tangles and mats. It makes the cutting process smoother. Use a brush that suits your dog’s coat type. For long-haired dogs, a slicker brush works best. For short-haired dogs, a bristle brush is good.
Let your dog get used to the grooming tools. Let them sniff and explore the scissors and brushes. This reduces fear and anxiety. Gradually handle the areas you plan to groom. Touch their paws, ears, and tail gently. This helps them get comfortable with the sensation.
Positive reinforcement is key. Give treats and praise during the process. This creates a positive association with grooming. Take breaks if your dog seems stressed or tired. Short, regular sessions work better than long ones.
A well-prepared dog makes grooming easier and safer. You’ll both enjoy the experience more. Take your time with preparation. It pays off in the long run.
Proper Handling Techniques
Properly handling scissors during grooming makes a big difference. The way you hold and use the scissors affects both safety and the quality of the cut. Here’s how I do it:
Grip and Positioning
First, grip the scissors firmly but comfortably. Place your thumb in one hole and your ring finger in the other. Your index and middle fingers help guide the scissors, providing stability. Keep your wrist straight to reduce strain and improve accuracy.
Movement and Control
Use small, controlled movements. Start with short snips, especially if you’re new to grooming. This reduces the risk of mistakes and allows for precise cuts. Always move the scissors in the direction of hair growth to prevent pulling and ensure a smooth finish.
Safety Measures
Keep your fingers between the scissors and your dog’s skin. This creates a buffer, reducing the chance of cutting too close. Use rounded-tip scissors around sensitive areas like the face and paws to avoid accidents.
You’ll groom your dog more confidently and effectively by mastering these handling techniques.
Starting with Basic Cuts
Beginning with basic cuts helps build your skills. Here’s my approach:
Brushing and Sectioning
Start by brushing your dog’s coat thoroughly. This removes tangles and mats, making the hair easier to cut. Then, section the hair with clips. This keeps the area you’re working on clear and manageable.
Initial Snips
Make small, initial cuts to get a feel for the scissors and the dog’s coat. Focus on one section at a time. Use straight scissors for general trimming and curved scissors for shaping around curves.
Following Hair Growth
Cut along the direction of hair growth. This ensures a natural look and reduces the risk of pulling the hair. Regularly comb through the hair to check your progress and ensure even trimming.
Taking Breaks
Take breaks to let your dog relax. This helps keep the grooming session positive and reduces stress for both of you. Use these breaks to step back and assess your work, ensuring you achieve the desired look.
Using these basic techniques, you can start grooming your dog with confidence, making the process smoother and more enjoyable for both you and your pet.
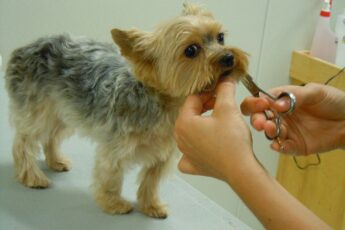
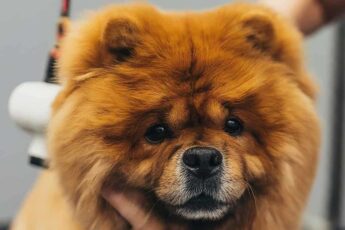
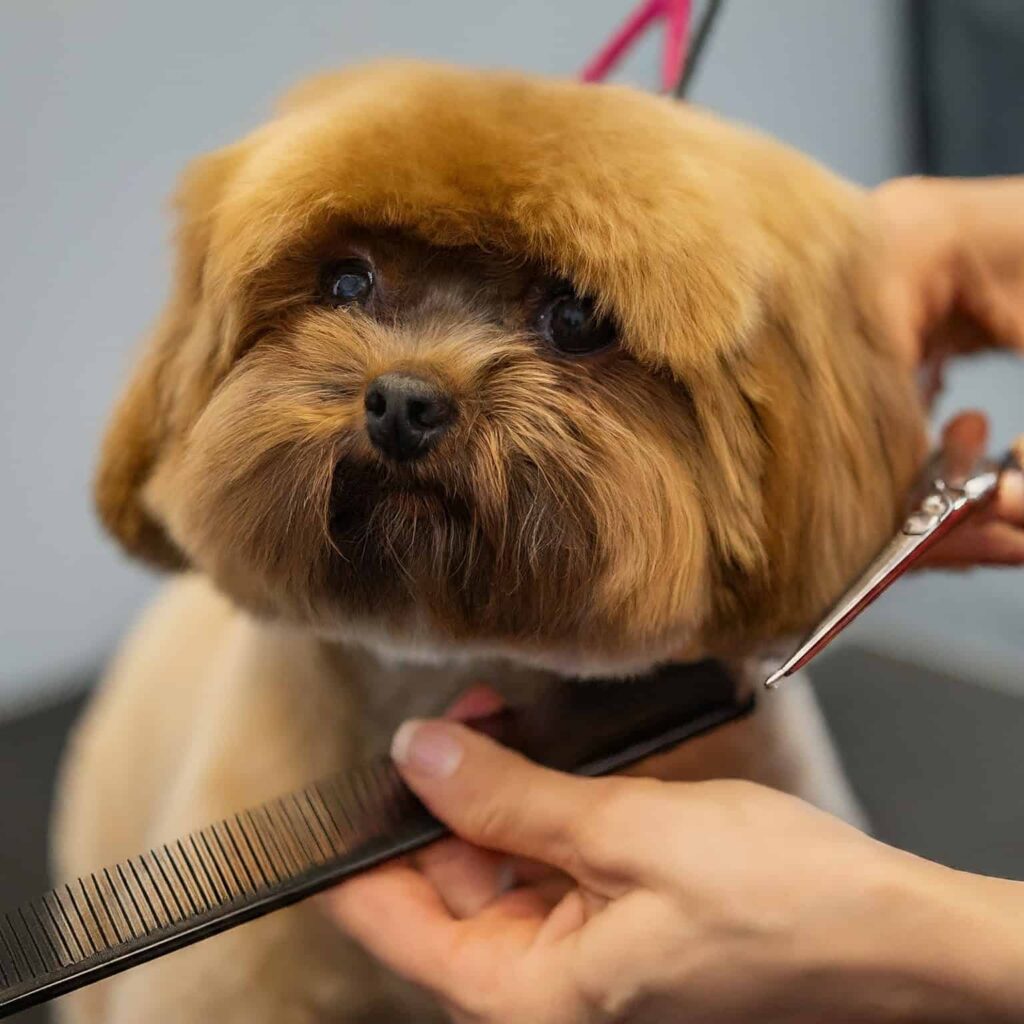
Trimming the Face and Ears
Trimming a dog’s face and ears requires precision and care. Here’s how I approach it to keep my dog looking clean and well-groomed.
Trimming the Face
- Tools and Preparation: Use small, curved grooming scissors with rounded tips. These are safer around the delicate areas of the face. Before starting, let your dog sniff the scissors to reduce anxiety. Keep treats handy for positive reinforcement.
- Around the Eyes: Start by trimming the hair between the eyes. Gently hold the fur away from the eyes using a fine-toothed comb. Trim slowly, maintaining about 1/4 inch of hair to prevent irritation. Work methodically around the eyes, being careful not to cut the eyelashes.
- Muzzle and Chin: Move down to the muzzle, trimming any long hairs that could obstruct your dog’s mouth or nose. Avoid trimming the whiskers, as they are essential for sensory input. For dogs with beards, trim to a uniform length, shaping as desired.
- Breaks and Rewards: Take breaks every few minutes to let your dog relax. Offer treats and praise to keep the experience positive.
Trimming the Ears
- Safety First: Hold the ear tip between your fingers to shield it from the scissors. Use curved scissors to follow the natural shape of the ear, trimming the hair evenly.
- Inner Ear Caution: Be extremely cautious around the inner ear. Trim only the hair that grows on the outer edges to prevent matting and keep the ear clean.
- Under the Ear: Lift the ear and trim the fur underneath. This area can trap moisture and dirt, so keeping it tidy helps prevent infections.
By following these steps, you can safely groom your dog’s face and ears, ensuring they stay clean and comfortable.
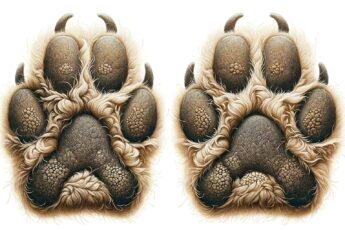
Grooming the Paws
Trimming your dog’s paws is essential for hygiene and comfort. Here’s my method for a safe and effective trim.
Trimming Around the Paws
- Tools Needed: Use straight grooming scissors and a slicker brush. Consecutive scissors are ideal for trimming the fur around the paws and between the toes.
- Preparation: Brush the fur around the paws to remove any tangles. This makes the trimming process smoother and prevents pulling.
- Trimming the Paw Pads: Hold your dog’s paw gently and trim the fur that grows between the pads. This helps prevent dirt buildup and provides better traction. Be careful not to cut the pads themselves.
- Around the Toes: Trim the fur around the toes, keeping the scissors parallel to the skin to avoid cuts. This keeps the paws neat and prevents matting.
Nail Trimming
- Nail Clippers: Use high-quality nail clippers designed for dogs. Regular nail trimming prevents overgrowth, which can cause discomfort and health issues.
- Cutting Technique: Trim a small amount of nails at a time to avoid cutting into them quickly, which can be painful and cause bleeding. If you’re unsure, consult a professional groomer or your vet for guidance.
- Positive Reinforcement: Always reward your dog with treats and praise after nail trimming to create a positive association.
By maintaining the fur and nails around your dog’s paws, you enhance their comfort and overall health, ensuring they can walk and run with ease.
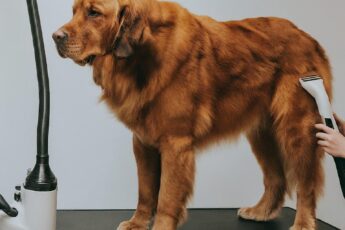
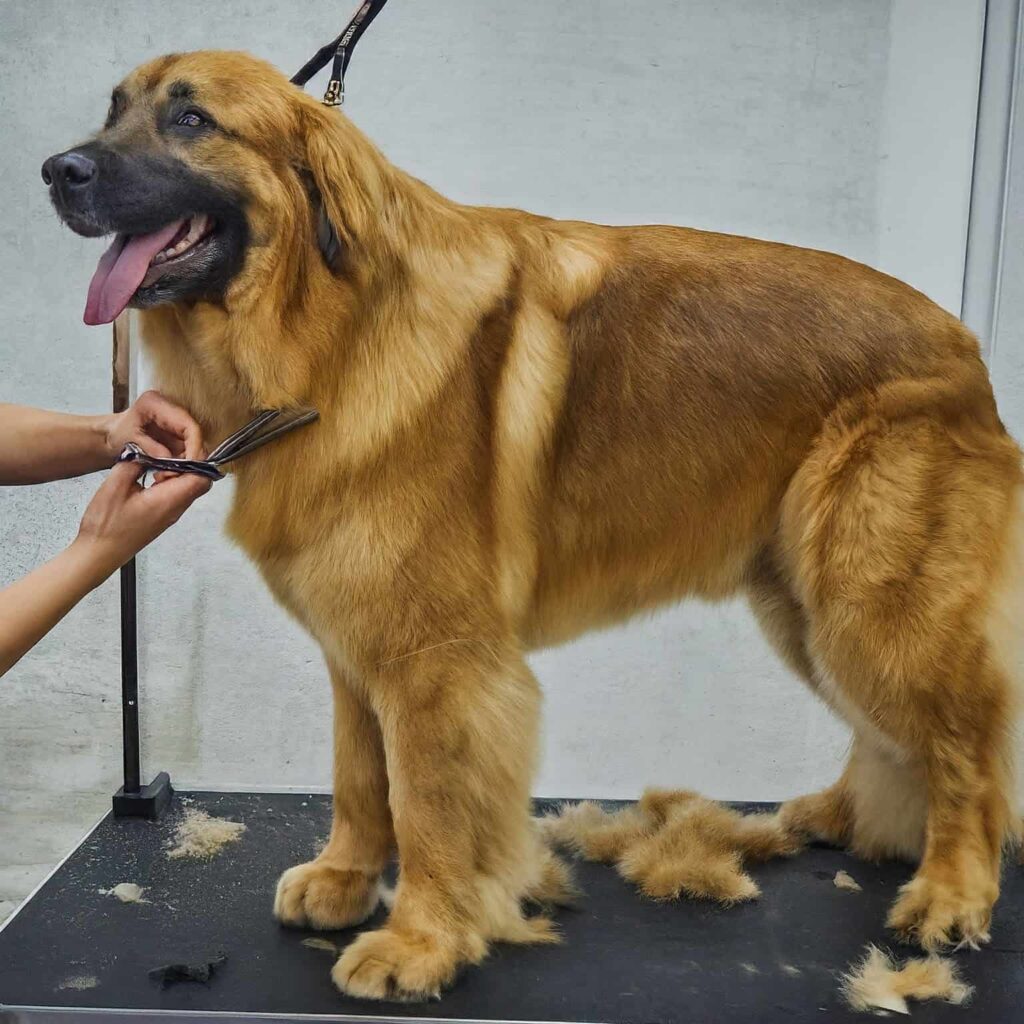
Body and Back Grooming
Trimming a dog’s body and back requires a careful and methodical approach to ensure a smooth and even cut. Here’s how I tackle it:
Tools and Preparation
Use straight grooming scissors for most of the bodywork. These are versatile and effective for trimming large areas. Start by brushing your dog’s coat thoroughly to remove any tangles or mats, making the trimming process smoother and more comfortable for your dog.
Trimming the Body
- Starting Point: Begin at the base of the neck. Hold the scissors parallel to the skin and point them downward. This position helps you avoid accidental cuts and ensures a more natural look.
- Method: Trim in straight lines, following the natural contours of your dog’s body. Move from the neck down to the tail, maintaining consistent pressure and motion. This technique helps prevent uneven cuts and lines.
- Blending: Use a comb to lift sections of hair as you trim. This enables you to see the hair’s natural fall and makes it easier to blend the cut lines. Comb through the hair regularly to check your progress and ensure an even trim.
- Sensitive Areas: Be mindful of sensitive areas such as the belly and underarms. These spots can have thinner skin, so use gentle, controlled cuts. If your dog has folds of skin, stretch them out gently to avoid nicks.
Taking Breaks
Trimming the body and back can be time-consuming, so take breaks to let your dog relax. Offer treats and praise during these breaks to keep the experience positive and stress-free for your pet.
By following these steps, you can achieve a professional-looking trim for your dog’s body and back while keeping its coat neat and tidy.
Grooming the Tail
The tail is a distinctive feature of many dogs, and grooming it properly enhances your dog’s overall appearance. Here’s my approach:
Tools and Preparation
Use curved grooming scissors for the tail. These are perfect for shaping and following the tail’s natural curve. Start by brushing the tail to remove any tangles. A slicker brush works well for this.
Trimming the Tail
- Shaping: Hold the tail out straight and trim to the desired length. Be cautious not to cut too close to the base of the tail, as this can cause discomfort. Aim for a balanced, even look.
- Curved Trimming: Use the curved scissors to follow the natural shape of the tail. Trim any stray hairs that stick out, and ensure the fur is even along the entire length of the tail.
- Underside: Lift the tail and trim the underside. This area often traps dirt and debris, so keeping it tidy helps maintain hygiene.
Finishing Touches
After trimming, brush through the tail again to ensure all hairs are even and no strays are left. This final brush-through helps check for any missed spots and smooths out the fur.
With these techniques, you can effectively groom your dog’s tail, ensuring it looks well-kept and enhances your dog’s overall appearance.
Underbelly Trimming
Trimming your dog’s underbelly is crucial for hygiene and comfort. Here’s how I manage it effectively:
Preparation
Before starting, ensure your dog is calm. A soft blanket on the floor and some treats can help. Have your scissors and a soft brush ready. Using baby wipes can also keep the area clean between baths.
Steps to Trim
- Calm and Control: Slip a collar over your dog’s head and attach a leash. This helps keep them steady. Ask your dog to lie on their side and reward them for staying calm.
- Brush First: Gently brush the underbelly to remove any tangles and mats. Be particularly gentle around the genital area.
- Trimming: Using small scissors, trim the long hairs around the genitals and the underbelly. Place your free hand between the skin and scissors to avoid accidental cuts.
- Clean Regularly: Use baby wipes to clean the underbelly area between grooming sessions. This helps keep the skin clean and free from irritants.
Trimming the underbelly regularly keeps your dog clean and comfortable, preventing mats and irritation from urine stains.
Ear and Eye Care
Regular ear and eye care are essential for your dog’s health. Here’s my approach to keeping these areas clean and free from infections:
Cleaning the Ears
- Tools Needed: Use cotton balls and a gentle ear-cleaning solution. Avoid using cotton swabs as they can push debris further into the ear canal.
- Cleaning Process: Moisten a cotton ball with the cleaning solution. Gently wipe the outer part of the ear, removing any wax or debris. Never insert anything into the ear canal.
- Drying: Gently pat the ear dry with a dry cotton ball. This helps prevent moisture buildup, which can lead to infections.
Cleaning the Eyes
- Preparation: Have cotton balls and warm water ready. Sterile saline solution can also be used.
- Cleaning Process: Moisten a cotton ball with warm water or saline solution. Gently wipe around the eyes, moving from the inner corner outward. Be careful not to touch the eye surface directly.
- Drying: Use a dry cotton ball to pat the area around the eyes dry. This helps prevent tear stains and keeps the area clean.
Regular cleaning of the ears and eyes helps prevent infections and keeps your dog comfortable. It’s a simple but important part of their grooming routine.
Addressing Common Mistakes
Avoiding common mistakes when grooming your dog with scissors is crucial for a safe and effective session. Here are some pitfalls and how I steer clear of them:
Cutting Too Close to the Skin
One of the biggest mistakes is cutting too close to the skin. This can lead to cuts and irritation. Always leave a small gap between the scissors and the skin to prevent this. Using your fingers as a guide helps maintain a safe distance.
Skipping Brushing Before and After Bathing
Brushing your dog’s coat before and after bathing is essential. Skipping this step can lead to painful tangles and mats. A thorough brush before a bath loosens dead hair and tangles. After brushing, remove any loosened hair and prevent new mats from forming.
Using Dull Scissors
Dull scissors can cause uneven cuts and discomfort for your dog. Regularly sharpen your grooming scissors to ensure a clean cut. Sharp scissors reduce the risk of pulling hair and make the grooming process smoother.
Neglecting Sensitive Areas
Sensitive areas like the ears, paws, and underbelly require extra care. Use rounded-tip scissors and trim these areas gently. Always be cautious and take your time to avoid accidents.
Avoiding these common mistakes makes grooming safer and more enjoyable for both you and your dog.
Handling Anxiety and Stress
Grooming can be stressful for some dogs. Here’s how I help my dog feel more comfortable during grooming sessions:
Positive Reinforcement
Positive reinforcement techniques, like treats and praise, can make grooming a positive experience. Rewarding your dog for good behavior during grooming sessions helps build a positive association with the process.
Desensitization Exercises
If your dog is particularly sensitive to grooming, try desensitization exercises. Start by gently touching sensitive areas, such as the ears or paws, for short periods. Gradually increase the duration and intensity, always pairing each touch with a reward. This helps your dog get used to being handled in these areas.
Creating a Calm Environment
Ensure the grooming area is calm and free of distractions. A quiet, comfortable space helps reduce anxiety. You can also play soft music to create a soothing atmosphere.
Patience and Persistence
Patience is key. Every dog is different, and it may take time for them to adjust to grooming. Stay calm and reassuring throughout the process. Celebrate small victories and be persistent. With time and practice, grooming can become a stress-free routine.
By focusing on positive reinforcement, desensitization, and creating a calm environment, you can help your dog feel more at ease during grooming sessions.
Advanced Techniques
Grooming your dog with scissors can go beyond basic trimming to achieve a professional look. I use advanced techniques to make my dog’s coat look its best.
Using Chunkers for Texture
Chunkers are a special type of scissors designed for adding texture and blending. They have teeth on one blade and a straight edge on the other. Use them to soften the transition between different lengths of hair. For example, after trimming the body with straight scissors, use chunkers to blend the cut lines for a natural finish. This technique is especially useful for breeds with layered coats.
Special Methods for Different Coat Types
Different dogs have different coat types, and each requires a unique approach. For example, double-coated breeds like Huskies use thinning shears to remove excess undercoat without affecting the topcoat. This helps maintain the coat’s natural insulation properties while reducing shedding. For curly-coated breeds like Poodles, use curved scissors to shape the curls and keep them looking tidy.
Blending for a Natural Look
Blending is key to a polished, professional look. Start by using straight scissors to trim the bulk of the hair. Then, use thinning shears to blend the edges. Hold the thinning shears at an angle and make small cuts, constantly checking your progress with a comb. This method helps avoid harsh lines and gives the coat a smooth, even appearance.
Mastering these advanced techniques can elevate your grooming skills and help you achieve a salon-quality finish at home.
Safety Tips
Safety is paramount when grooming your dog with scissors. Here are some essential tips to keep both you and your dog safe.
Regularly Check Scissors for Damage
Inspect your scissors before each grooming session. Look for nicks or dull spots on the blades. Sharp, well-maintained scissors reduce the risk of pulling hair and causing discomfort. If the blades are boring, have them sharpened by a professional. Regular maintenance ensures clean cuts and a better grooming experience.
Keeping a First-Aid Kit Handy
Accidents can happen, even with the most careful grooming. Keep a first-aid kit nearby. It should include styptic powder, antiseptic wipes, and bandages to stop bleeding. Knowing how to use these items can prevent minor injuries from becoming serious issues.
Proper Storage of Grooming Tools
Store your grooming tools in a clean, dry place. Use a dedicated case for your scissors to protect the blades from damage. Proper storage extends the life of your tools and keeps them hygienic. Clean your scissors after each use to remove hair and residue, and oil the pivot point to keep them operating smoothly.
Taking Breaks and Monitoring Your Dog
Grooming can be tiring for your dog, especially if the session is long. Take regular breaks to let your dog rest. Watch for signs of stress or discomfort, such as panting or fidgeting. A relaxed dog is easier to groom and less likely to have accidents.
By following these safety tips, you can create a safe and comfortable grooming environment for you and your dog. (Dog Care – Daily Puppy)